| Loading and Saving |
PhotoLine 17.5 OpenEXR Import and Export OpenEXR is a HDR file format, that was published as an open standard. The HDR file format is able to save image data as float values with a precision of up to 32 bits per color channel. As PhotoLine is supporting color channels with 32 bits per channel, too, it is obvious to support OpenEXR, both reading and writing. |
||||||||
| Loading and Saving |
SVG Import and Export
Scalable Vector Graphics (SVG) is a recommended specification of the W3C for vector graphics on web pages. This means many people will use this format in the future. PhotoLine already had a basic SVG support in the past, but it has been extended considerably. Now it can handle even complex documents including a mixture of vector graphics, text and images. |
||||||||
| Loading and Saving |
PDF Import and Export
|
||||||||
|
OpenType Features
On Mac OS X PhotoLine now supports OpenType features in text layers. |
|||||||||
|
In the menu: Layout > Document |
Rotate Document
PhotoLine can rotate images both virtually and physically. With virtual rotation PhotoLine just adds an attribute to layer, which tells it to rotate the layer on output. Physical rotation really rotates the image and modifies its pixels. In picture mode - this means, that there is a background image, that controls the size and the color space of the document - Rotate Document will now physically rotate all image layers. Image parts protruding from the document can optionally be removed. Advantage: Adjustment layers and layer masks have the same size as the background layer after rotating. |
||||||||
|
32 Bit Images, Float Images, HDR Images
Three names for the same type of image. With 32 bit images the three channels of an RGB image will not be stored using byte values in the range of 0 to 255, but using float values. This has several advantages. You have a much larger range, you can define values whiter than white or blacker than black, you can calculate more efficiently with the image data, and so on. The support of 32 bit images has been improved:
 |
|||||||||
 |
The Gradient Tool
In the past you were already able to edit a gradient directly after creating it. But after switching the tool or the active layer, the user interface for editing the gradient was gone. This restriction no longer exists. |
||||||||
|
In the menu: Layer > Display > Color Filter |
Color Filter
The Color Filter is a powerful tool controlling the opacity of a layer based on its color values. This settings are not fix, but can be edited later on. The palette “Attributes > Layer” can now be used to quickly turn on and off the Color Filter to check its effect. 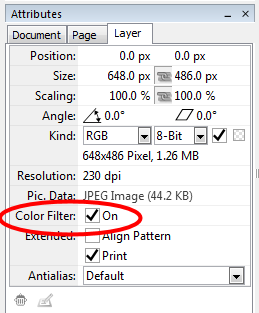 |
||||||||
 |
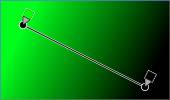
Measurement Tool with Scale
In order to correctly measure distances and areas in scanned maps, the measurement tool now has a scale. Just follow a path on the map with a vector line or enclose an area, and PhotoLine will calculate the result. |
||||||||
|
Browse
After browsing a directory PhotoLine is storing a file Browse.plb inside. This avoids redundant browsing. Unfortunately saving the Browse.plb on SD cards or USB sticks could be quite slow in the past. Now it should be much faster. |
|||||||||
|
Middle Mouse Button, Windows
On Windows you can now use the middle mouse button to scroll the visible part of the document. Of course using the space bar still works. |
|||||||||
| At Tool Settings |
Text Settings
If you had selected a text with different attributes (font size, color, ...) in previous versions, the text settings always showed the first attribute. Now the corresponding field is cleared to directly show you, that there are multiple attributes. |
||||||||
|
In the menu: Filter > Digital Camera |
Chromatic Aberration
The function for correcting chromatic aberrations (different scalings of the RGB color channels) can now be used as an adjustment layer.  |
||||||||
|
In the menu: Tool > Lasso |
Layer <-> Lasso
In the past the functions Convert Layer to Lasso and Convert Lasso to Layer shared a common menu entry, using the appropriate function depending on the current situation. If you wanted to put these functions in an icon bar, this was a problem. Therefore there are two distinct menu entries now. 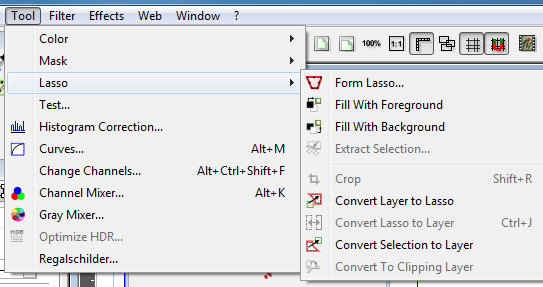 |
||||||||
|
In the menu: Layer > Management |
Save Layer
Save Layer used to save only the active layer. Now it can save all selected layers. |
||||||||
|
Color Lists
The color lists could only save all colors. Now you can export only the selected colors, too. |
|||||||||
|
Text Fields
Text fields have many ways for editing there values aside from typing. Some have an associated slider and most of them have a small double-arrow control. Now there are two more ways to adjust the input more comfortably and faster:
|
|||||||||
|
PNG Export
On saving images with transparency as PNG, the color channels, that are completely transparent, will be cleared. This way the resulting PNG file can become significant smaller. |
|||||||||
Toolbox
 |
Curve Creation Tool
The Curve Creation Tool is used for creating vector graphics. It can create both curves and lines and edit them afterwards. Until now it has not been possible to create a line directly after a curve. Now you can force creating one by holding the Shift key. Furthermore the tool now has more distinct mouse cursor shapes to give better feedback on the kind of operation you are going to do. |
||||||||
|
In the menu: Web |
Web Export
The Web Export has a preview (in fact it has 3). Now you can define the visible part in the preview by clicking in the document window - the same way as with the standard filters. 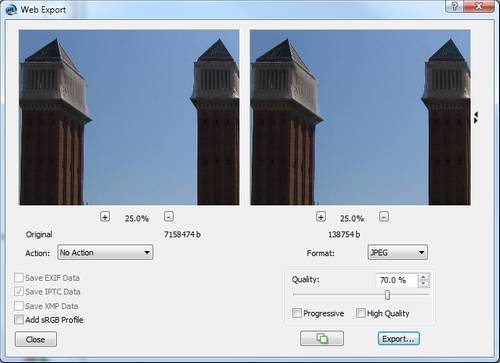 |
||||||||
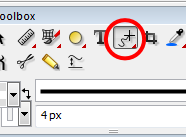
Toolbox
 |
The Stamp Tool
Like the brush tools the stamp tool can now use the advanced features of a graphic tablet. 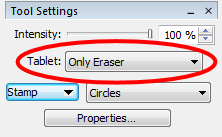 |
||||||||
|
The Color Editor
On Mac OS X the color editor now has a color picker, too, allowing you to pick a color from anywhere on the screen. 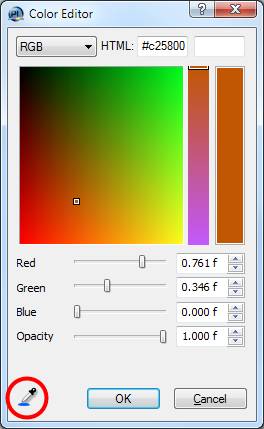 |
|||||||||
|
In the menu: Layout > Page |
Save Page(s)
If you are saving multiple pages, the function Save Page(s) can now optionally save each page as a separate file. |
||||||||
|
Plug-in Support
The support of third-party plug-ins has been improved. |
|||||||||
| Context menu of color fields |
Harmony
Color fields offer an advanced way for choosing corresponding colors: the function Harmony. In order to allow working more precisely, the Harmony dialog can be scaled now. 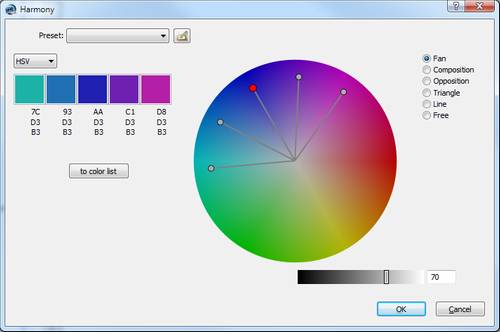 |
||||||||
|
The Tool Box
Using the classic screen setup of PhotoLine, the tool bar is at the left side and the tool settings are at the right. You see the problem: After changing the active tool you have to move the mouse across the whole screen in order to modify the settings. Now you can make the tool bar wider, allowing the tool settings to be placed directly below it. You may loose a bit of horizontal screen space by doing so, but that is not really bad, because screens are becoming wider and wider (the ratio changed from 4:3 to 16:10 to 16:9). And you have the additional advantage, that now you have more vertical space available for the important dialogs “Layers/Channels” and “Attributes”.   |
|||||||||
|
In the menu: tool |
Curves
The Curves tool of PhotoLine has the unique feature of editing “virtual” color channels, meaning color channels, that in reality don't exist. So for example, if you have an RGB image, you can edit the L channel of the Lab color space. Now you can use the HSV color model for editing, too. 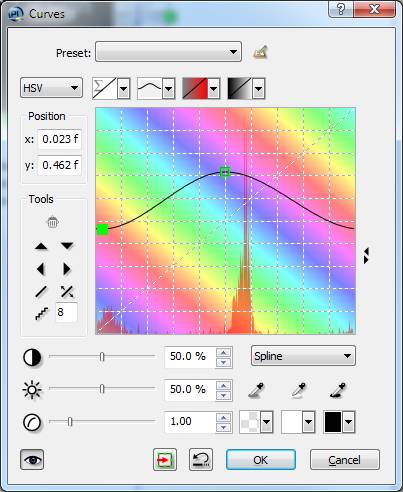 |
||||||||


|
PhotoLine 17
Powerful image processing doesn't have to be expensive. PhotoLine is proofing that for many years now. Through its steady progress - in near contact to our users - it offers all modern tools needed for enhancing images. We simply wish, that you like our application, and are looking forward for your suggestions in our user forum. General Comments Main focus of the new version 17 is image processing. In addition, various functions are now faster and many minor improvements have been made. Common Functions Simple Browse The Simple Browse window is a simplified variant of the normal Browse window. All parts with the exception of the file list have been omitted. The result is a space efficient panel which can stay open all the time. In order to allow navigation, Simple Browse is listing folders in the file list, too. The folder ".." has a special meaning and is used for leaving the current directory. Furthermore the title bar of Simple Browse offers an expandable folder tree. Additionally the context menu of the file list provides access to most important commands of the Browse panel. |
||||||||
|
In the menu: Layout > Image > Trim Image |
Trim Image
Trim Image removes the transparent edges of an image and thus reduces its size. |
||||||||
|
In the menu: Tool > Color > Export Color Profile |
Export Color Profile
You can use this function to save the color profile embedded in a document. |
||||||||
|
In the menu: Tool > Color > Selective Color Correction |
Selective Color Correction
Selective Color Correction is used for adjusting colors in an image. It originally comes from the prepress industry and therefore the correction is limited to the printing colors cyan, magenta, yellow and black. Colors controls which colors will be corrected. You can modify several colors withou leaving the dialog. 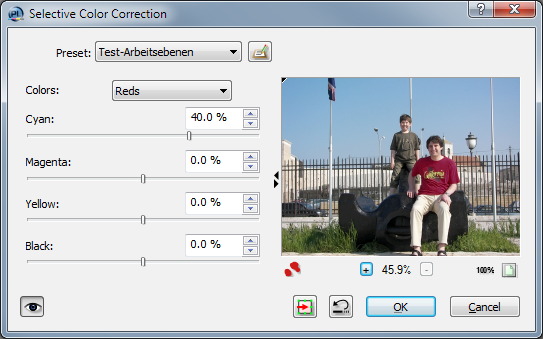 |
||||||||
|
In the menu: Tool > Color > Threshold |
Threshold
The function Threshold converts an image to pure black and white. You can define a threshold value, and the parts of the image brighter than that threshold will become white, and the rest black. 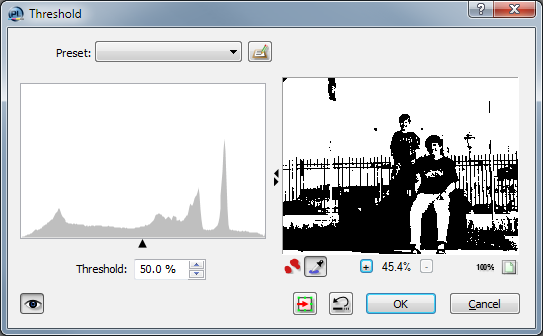 |
||||||||
|
Function for "Smart" Removal
PhotoLine has two tools for "smart" removal:
|
|||||||||
|
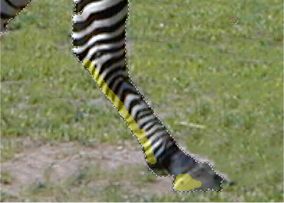
The Remove Brush
The Remove Brush is mainly intended for small corrections. The Remove Brush can work with multiple layers. If you create a new empty layer with transparency above the one you want to correct, you can paint all corrections directly into this new layer. The original image will not be modified. You can use this tool to remove pinples and moles with a single click: 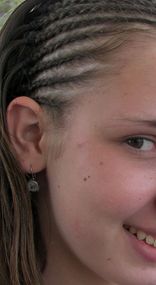
 |
||||||||
|
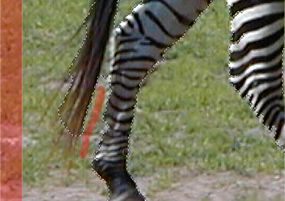
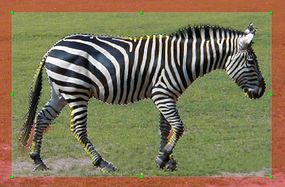
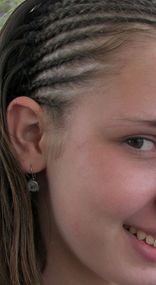
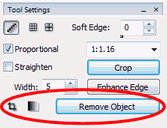
Remove Object
Remove Object deletes the selection. Usually you just have to create a selection and apply the function. In more difficult situations you can control, where PhotoLine should search for replacing image parts. Example
|
||||||||
|
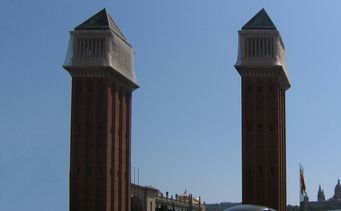
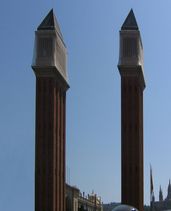
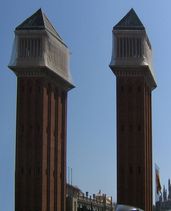
In the menu: Layer > Scale Layer 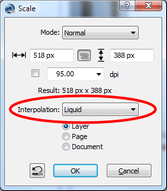 |
Scale Layer With "Liquid" Mode
"Liquid" will not scale the image equally, but instead it will try to keep the size of the important parts and to scale only the unimportant ones. You can create a selection to define the important parts by yourself. The quality of Liquid scaling heavily depends on the scene of the photo.
As you can see, with liquid scaling the width of the towers nearly stayed the same. Most of the scaling happened in the place in-between. | ||||||||
|
New and Enhanced Tools for Creating Cut-Out Masks New tools make it easier to create cut-out masks:
|
|||||||||
|
The Mask Brush
The Mask Brush is used to edit an existing mask. You don't have to turn on the mode "Edit Mask" in order to do this. The Mask Brush has two subtools. The brush allows editing parts of an image and is adding them to the selection this way. The eraser protects image parts from editing and removes them from the selection. You can access the eraser quickly by holding Alt. You can use the right mouse button, too, if you have configured PhotoLine that way (in the preferences see "Clear with right mouse button"). |
||||||||
|
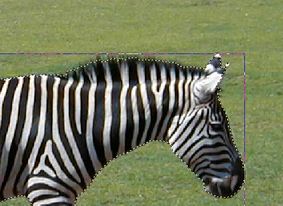
The Quick Selection Tool You use the Quick Selection tool in two steps. First you create a rectangle enclosing the object. PhotoLine will then automatically start computing a first proposal for the selection. In the second step you repeatedly place object and background marks, until you are satisfied with the result.
|
||||||||
|
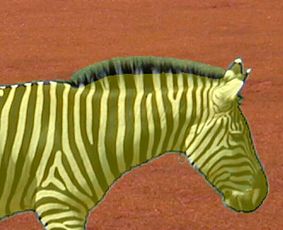
The Border Matting Tool The Border Matting tool is used to create cut-out masks for semi-transparent areas like hair. Usually you first create a basic selection with another tool - i.e. the Quick Selection tool or the automask - and enhance that with the Border Matting tool in the critical areas.
|
||||||||
|
In the menu: View > Panels > View |
Magnifier in the View Window
The Magnifier shows an enlarged view of the piece of the document at the current mouse position. It has three working modes. Document shows the whole document, Layer the active layer and Selection only the current selection. The modes Layer and Selection allow to define a background color. This is especially useful for the mode Selection, because by choosing an appropriate background color you can control the quality of your selection more easily. 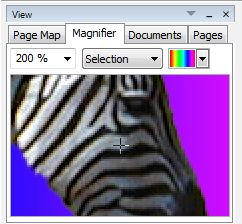 |
||||||||
|
In the menu: Edit > Copy Without Colored Edge |
Copy Without Colored Edge
Copy Without Colored Edge copies the selection of the active image layer. On copying the colors of the background will be removed from the edge of the selection depending on the mask values. This way the result can be inserted in a new document without a disturbing colored fringe. |
||||||||
|
In the menu: Tool > Lasso > Extract Selection In the Tool Settings of the Border Matting Tool: 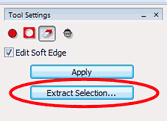 |
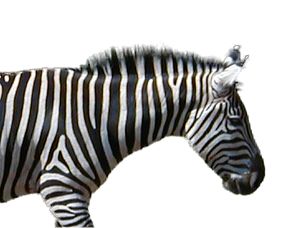
Extract Selection Extract Selection has 3 subtasks:
 The dialog allows to define a custom background color for the dialog preview. This way you can better check the effect of your settings. |
||||||||
|
What was new in: Version 16 Version 15 Version 14 Version 13 Version 12 Version 11 Version 10 Version 9 |